Installing Appleton Spotlights
- This topic has 25 replies, 10 voices, and was last updated 2 years, 7 months ago by
 Paulie.
-
AuthorPosts
-
February 15, 2016 at 11:44 #34827
 Rik HovingKeymaster
One of the most popular (and controversial) Custom Car Accessories is the Appleton Spotlights which have been used on Custom Cars from the beginning in the 1930’s. Today the Appleton Spotlight is a very popular Custom Car Icon part that is high on the list of many Custom Car enthusiast who wants to build a period looking Custom. Back in the 1940’s and 1950’s the body shops installed dozens of these Spotlights and they were very good at it. Shops like the Barris and Ayala shop were expert in how to install them the best way possible on all model cars around.
With the help of a few dedicated CCC-Members we have put together two very interesting Appleton Spotlights articles on the CCC. One article about how to Restore the Appleton Spotlight by Manael Reyes.
And one article about how to properly Install the a set of Spotlights based on an Speed Mechanic magazine article from 1954.A few CCC-Members have studied these techniques on how to install the Appleton Spotlights the best way possible and have shared some valuable information here on the CCC in a few others posts. We have received some very positive messages about the material we have shown here on the CCC about installing these Spotlights. But there always seem to be a lot of questions about specific details on how to install them, how to best take them apart, restore, replace, etc. So its time to start a new CCC-Thread where all the info on the Appleton Spotlights and how to restore and install them comes together.
A place were you can ask anything you need to know, and hopefully we will be able to share as much info and answer as many questions.We start with some comments Rob Radcliffe made about the experience he did when he installed several Spotlights on the customs in his King Kustoms shop in Temecula Ca.
Rob Radcliffe mentioned
It’s a lot harder to install Appletons than it appears, especially if you want the right look with the handle stems parallel to the beltline of the car. Having the correct templates is the first step, but I’ve used those only as a starting point sometimes… eventually moving the mounting bracket location down closer to the beltline.
If you look at all of the Barris cars in the early days, their Appleton locations were near- perfect… not an easy thing to do! Dick Jackson was the main guy installing them at Barris Kustoms, but I’m sure many other employees did them too.
I can tell you that some of the correct, original Appleton brackets can fetch at least $75-$80 for a ’49-’51 Merc, which is L999 or L997 depending on passenger or driver side. The passenger side brackets are very hard to find because there was more of a market for installing just one spotlight on the driver side. One option nowadays is using a pair of dummy spotlight outside brackets since the thread is the same as an original Appleton… there is a lot of meat on them to shave down for the right angle, but you still have to know the right angle/pitch of the bracket you are trying to replicate.

Here’s (above) an original Appleton drill guide. It would be easy to copy with some threaded tubing. If you have a dummy spotlight that is junk, cut off the threaded part and slip a piece of tubing inside that has a 1/2″ inside diameter hole for the 1/2″ drill. All you really need is about 1-2″ of sleeve to get the drill bit to go straight through.
Maybe even JB weld them together since it’s pot metal.


Enjoy the beauty of Customizing
February 15, 2016 at 13:09 #34835Rik HovingKeymasterFrom another CCC-Posts:
Kari Saarela posted a link on Facebook for replacement glass for the Appleton Spotlight.
I thought it would be good to post it here in case anybody is looking for one.I’m do not know anything about this product and if if is a perfect fit or not. But the site provides all the info you need including measurements.
Replacement for Appleton Hand Held Spotlight
Wattage: 30W 30 Watts Voltage: 12V, 12.8V, 12.8, 12 Volt Volts Glass: PAR46, PAR 46, PAR-46 Base: Screw Terminals Beam Spread: Spot, Spotamp, 5° Horizontal, 5° Vertical Filaments: C-6, Shielded Average Rated Life: 100 hours Maximum Overall Length: 3.75″ Maximum Overall Diameter: 5.75 Inches, 146mm MBCP: 75,000

David Wolk bought these replacement bulbs and was able to use them with a bit of modifications.
This is what David wrote:The replacement GE bulbs worked in my Appletons, but required some slight modification to the bulbs.
The edge of the bulb appears to be thicker than the old bulbs in my spotlights, and thicker than the original reflector and lens. I couldn’t get the bezel to fit until I ground the back edge of the bulb using the edge of a thin cut off wheel on a 4” grinder.
Once I ground on the edge of the bulb the spotlights assembled without too much trouble.
If you try this, be careful not to get the bulb too hot. It doesn’t take much work to trim the edge.
Good Luck, David


Enjoy the beauty of Customizing
February 15, 2016 at 13:54 #34839Rik HovingKeymasterPhotos from Palle Johansen installing a set of Spotlights on his 1947 Cadillac Convertible with chopped padded top.
Palle did not have an Appleton paper template, nor an official Drill-guide. So he had to be a little creative to make it all work.


Enjoy the beauty of Customizing
February 15, 2016 at 13:55 #34840Rik HovingKeymaster


Enjoy the beauty of Customizing
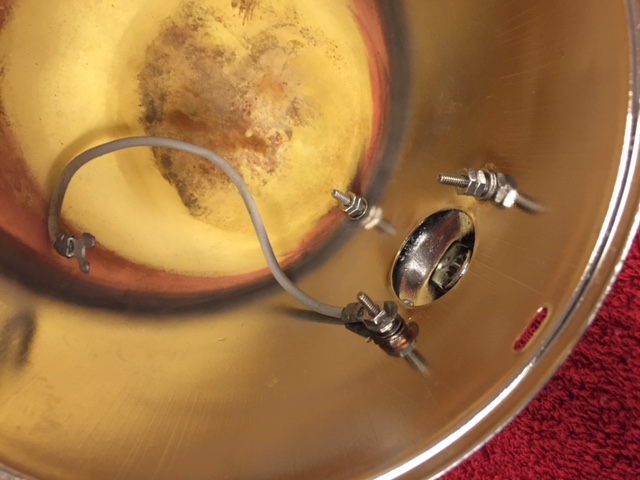
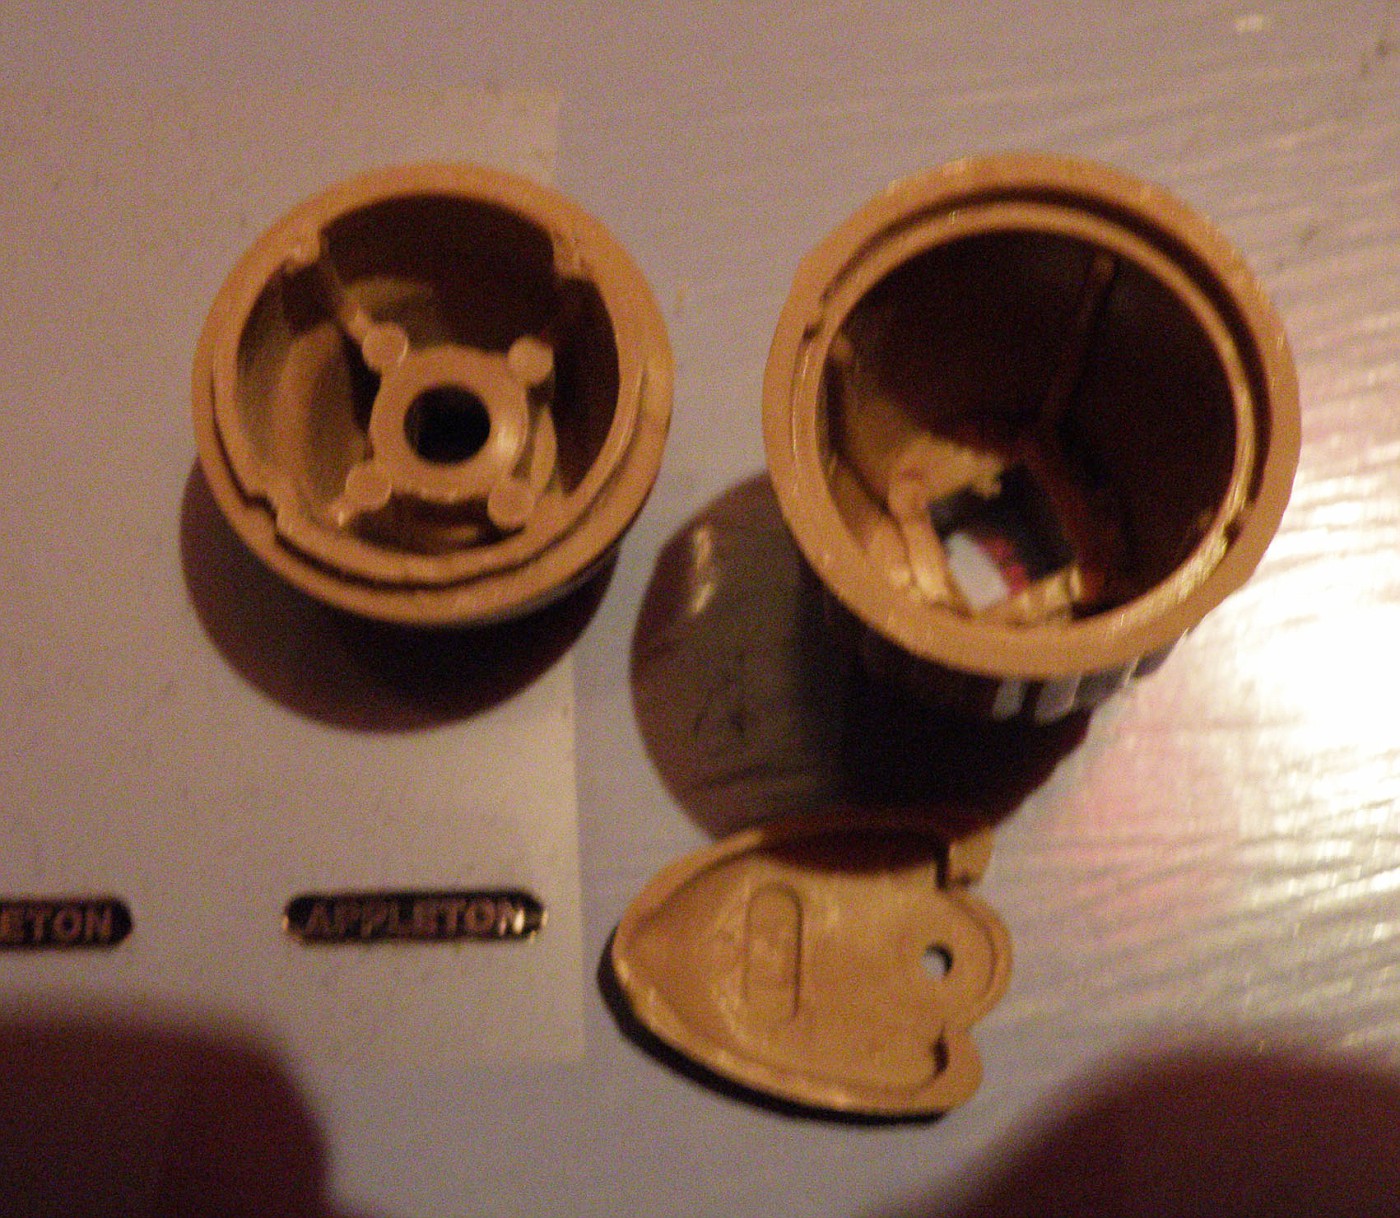
February 15, 2016 at 14:35 #34868Rik HovingKeymasterDavid Wolk shared this info about replacing the rivets on his S-552 restored Appletons Spotlights;
I’ve recently been restoring a set of 552 appletons and I’ve struggled in my mind with replacing the rivets. I bought rivets but I was afraid of damaging or dinging the re-chromed housings. A couple weeks ago I found this website Restoration Stuff they sell smooth headed stainless steel screws that look like rivets. See page 40 of their catalog. They call them threaded rivets. I purchased #4-40 rivets (screws) with lock washers, flat washers and enough nuts to double nut the screws. I spent less than $10 and don’t have to worry about damaging anything. I’ve attached a few photos.
Hope this info helps others.


Enjoy the beauty of Customizing
February 16, 2016 at 00:20 #34873 Doug CharterParticipant
Hi Rik……Great workshop..these lights are starting to become unrealistic in price recently…
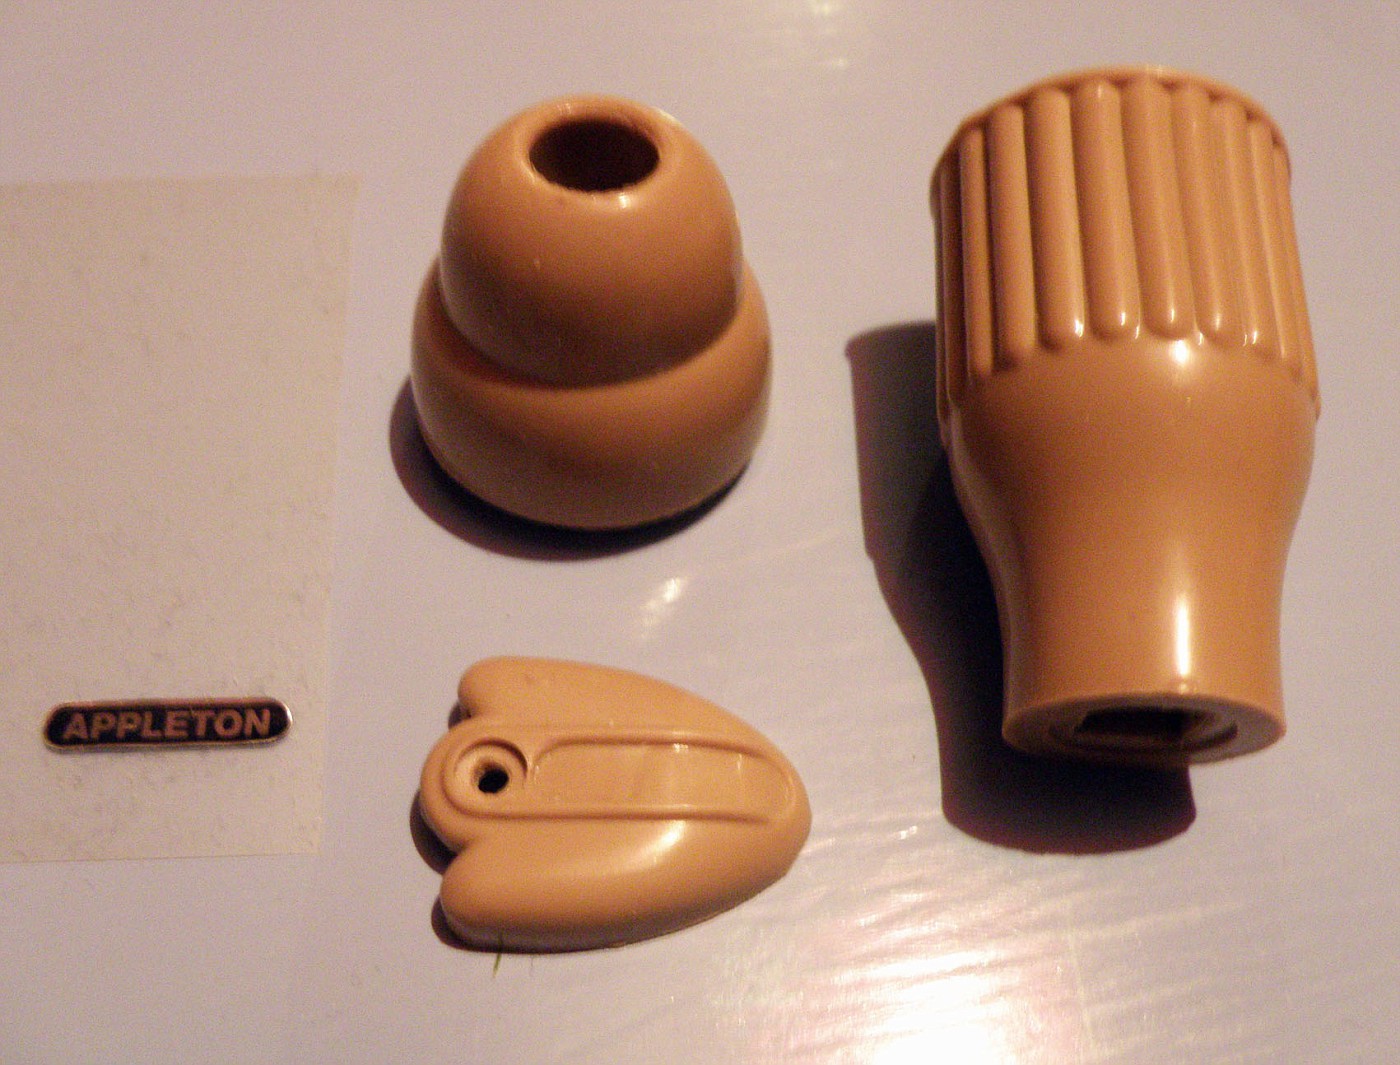
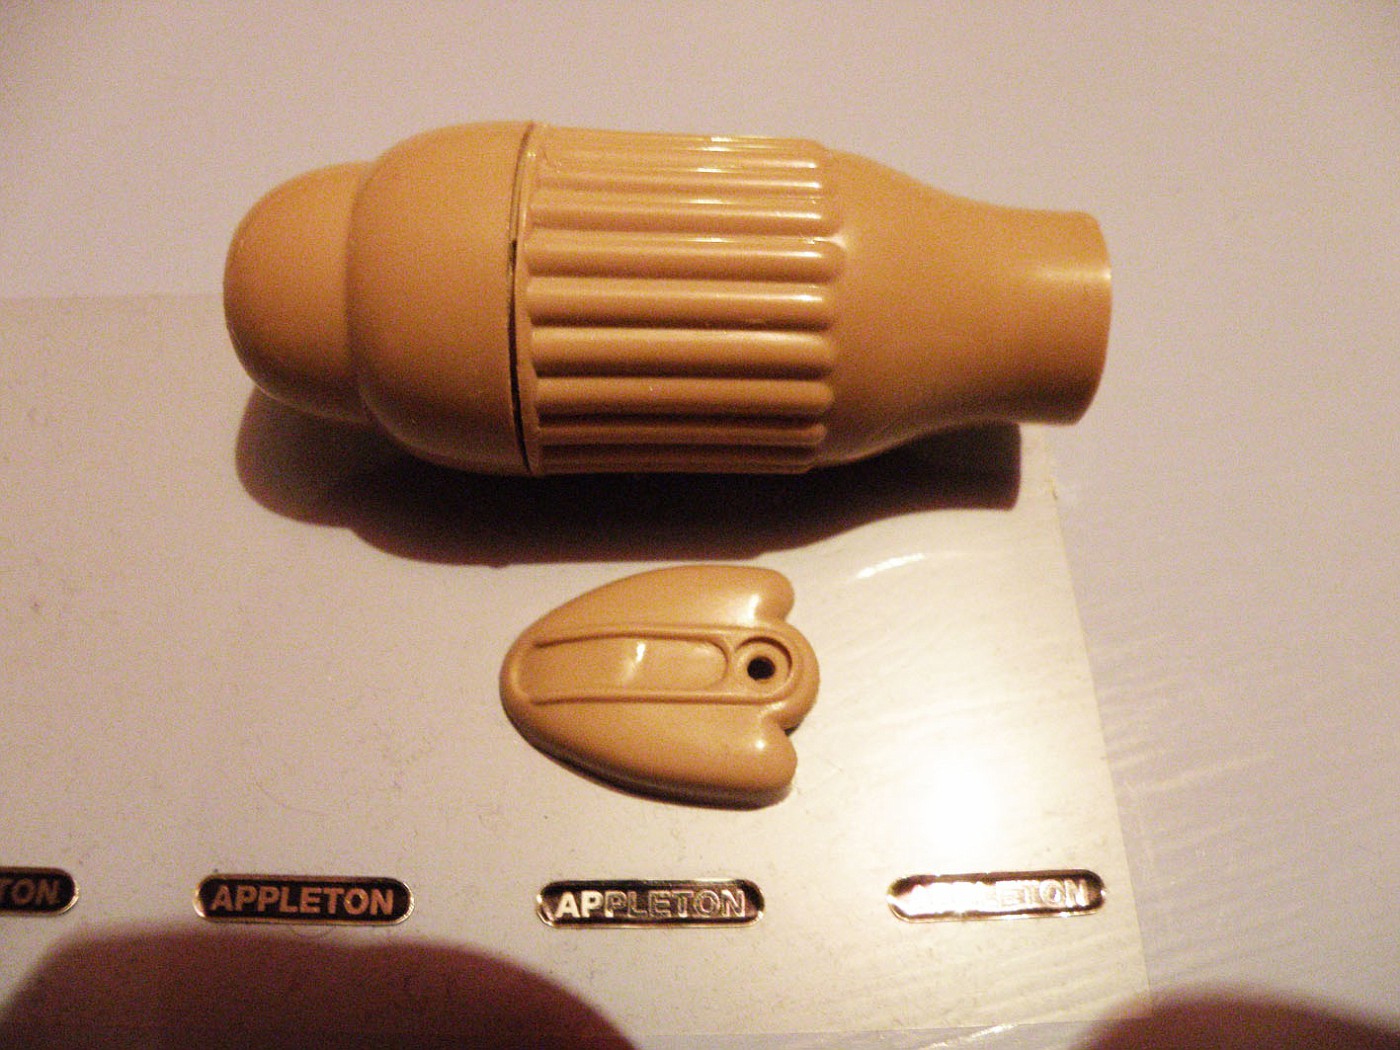
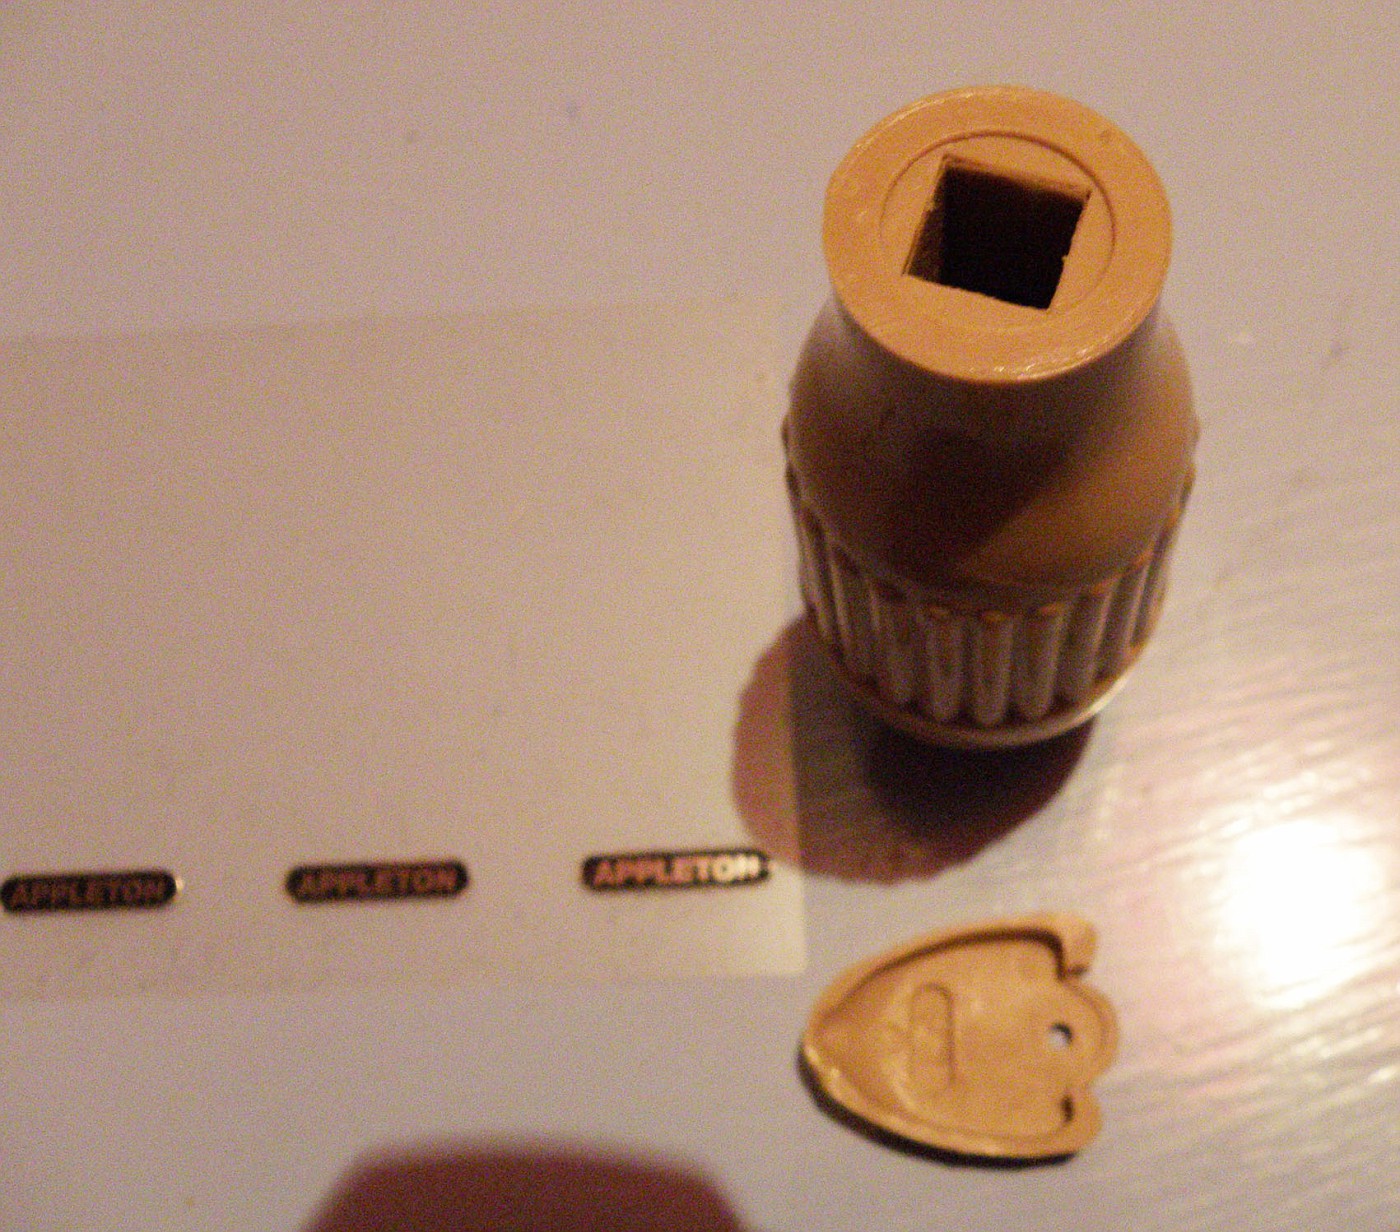
February 16, 2016 at 06:20 #34874Rik HovingKeymasterStefan Lundgren has produced this accurate set of plastic for the Appleton S-112’s.
This set is currently out of production, but if there is enough interest Stefan will produce a new set of molds and a new run of these again.So if you are in need of a replacement set of plastic for your Appleton S-112’s, then please comment here, or send us an email.
Reproduction Appleton S-112 handles complete set of six pieces (for a complete set of two Appletons) plus adhesive backed Aluminun printed Appleton scripts.
Enjoy the beauty of Customizing
February 16, 2016 at 17:49 #34878 TorchieParticipant
Thanks for putting all this info into one post Rik.
As Doug posted the price for the 112’s or the 552’s have become quite high. Especially if you have to have them repaired and chromed. But to many they are the true hallmark of a period correct custom car.
My own project has a hole drilled on the DS already for a spotlight which is not unusual for a truck cab. I am still on the fence in regards to using spots at all or just one instead of two.
I know that there has been talk over on the HAMB about some one reproducing the old style dummy spots that have the bucket shape like the Appletons. And I would think that there would be a market for a run of repro handles as this seems to be the part that is either missing or in bad shape.
TorchieFebruary 16, 2016 at 19:08 #34879 J.B.Participant
My take on this is not to take it too serious with the original templates. The way a spotlight was supposed to work on a police car or a commercial vehicle was maybe not the most designed way of having them. Research and carefully look at the pictures of cars of the same model you have and try to get it just right from a kustom point of view.
February 18, 2016 at 17:16 #34952 DavidParticipant
All great tips. Another one I picked up from Kurt McCormick is to use a large c-clamp to hold the bracket in place on the a-pillar to help position the bracket in just the right place. The screw of the clamp helps visualize where the spot light shaft will be. Here are a couple pics of when I did the spots on my Merc.
Attachments:
You must be logged in to view attached files.February 18, 2016 at 18:03 #34956 Tom NielsenParticipant
When I installed 552 Appletons on my ’49 Merc I started with a small pilot hole and checked to see if it came out at the right spot inside the car. Then using the brackets from a “dummy 60’s spotlight”, I made the hole bigger until everything fit. Like they say in carpentry, “measure twice, cut once!”
March 8, 2016 at 06:55 #35816Rik HovingKeymasterA friend mentioned this place out in Iowa called Accessoryland Truckin’ Supply
Apparently they have a large selection of Spotlight parts and mounting brackets that could be used for Appleton Spotlights. They do not list an inventory online, so you have to give them a call asking for specific parts.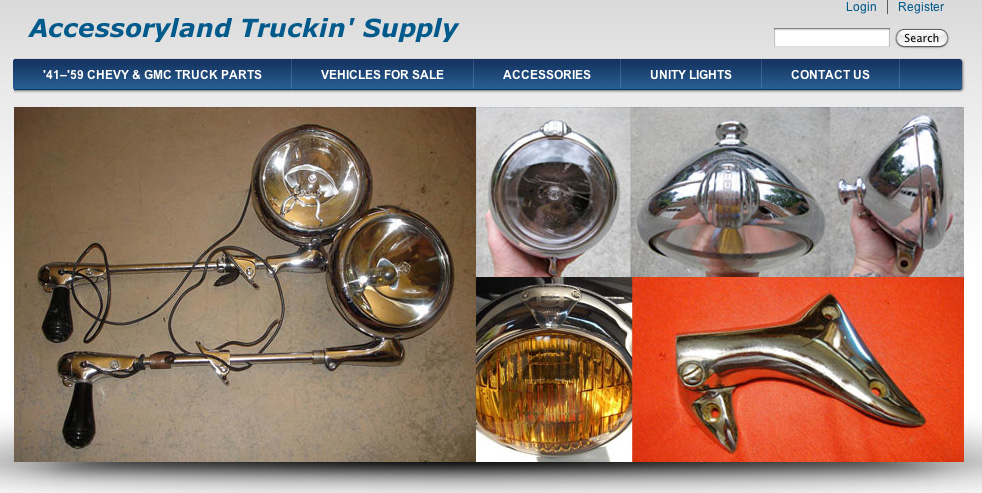
Enjoy the beauty of Customizing
March 8, 2016 at 21:48 #35872 Dave (a.k.a. rodncustomdreams)Participant
Funny you should mention Accessoryland Rik as I have a request in to them right now (waiting an email response). Because I am updating a pair of Guides (no money for Appletons “sad face here”) I am working with a lens of only 5 inches and was hoping to utilize a sealed beam to replace the bulb and reflector – we’ll see I guess as I can’t find such a beast listed on the web. I hope they can offer some assistance – in addition to some small items I need.. I will update when I hear back from them.
Dave
Jus' creepin' along..
March 8, 2016 at 23:13 #35881DavidParticipantI have purchased from Bob at Accessoryland several times. He has been very helpful each and every time and has yet to disappoint me by not having what I was looking for. Even got a set of NOS Appleton/Lorraine brackets for the Merc from him, complete with new screws and gaskets.
March 22, 2016 at 19:38 #36334Dave (a.k.a. rodncustomdreams)ParticipantNever did get a reply from Accessory Land, but I have a question for you all. I’ll try to make this as short as I can, but it really is just one question.
How does the mounting appear on the INSIDE of a finished car? I have spend days leafing through hundreds of Magazines, both old and new trying to find clear images of finished installations with little success. Often the mount is hidden by the steering wheel or is missing in the through-the-door pics. Of the perhaps dozen reasonably clear views I have, about 60 percent show the “friction bracket” visible against the A pillar upholstery or garnish, maybe 30 percent show only the “friction bracket body”/nut and perhaps 10 percent show only the shaft coming through the pillar. Is there a “proper” method of finishing the interior mounting of our spotlights (I’d like to do this in the accepted manner..)?
I know you fellas have the answer – so thanks in advance!
Dave
Jus' creepin' along..
-
AuthorPosts
- You must be logged in to reply to this topic.