
Installing Spotlights
INSTALLING SPOTLIGHTS
Spotlights have been a popular accessory item on custom cars since the early 1940’s. This article shows an excellent article on how to install them from the October 1954 issue of Speed Mechanics
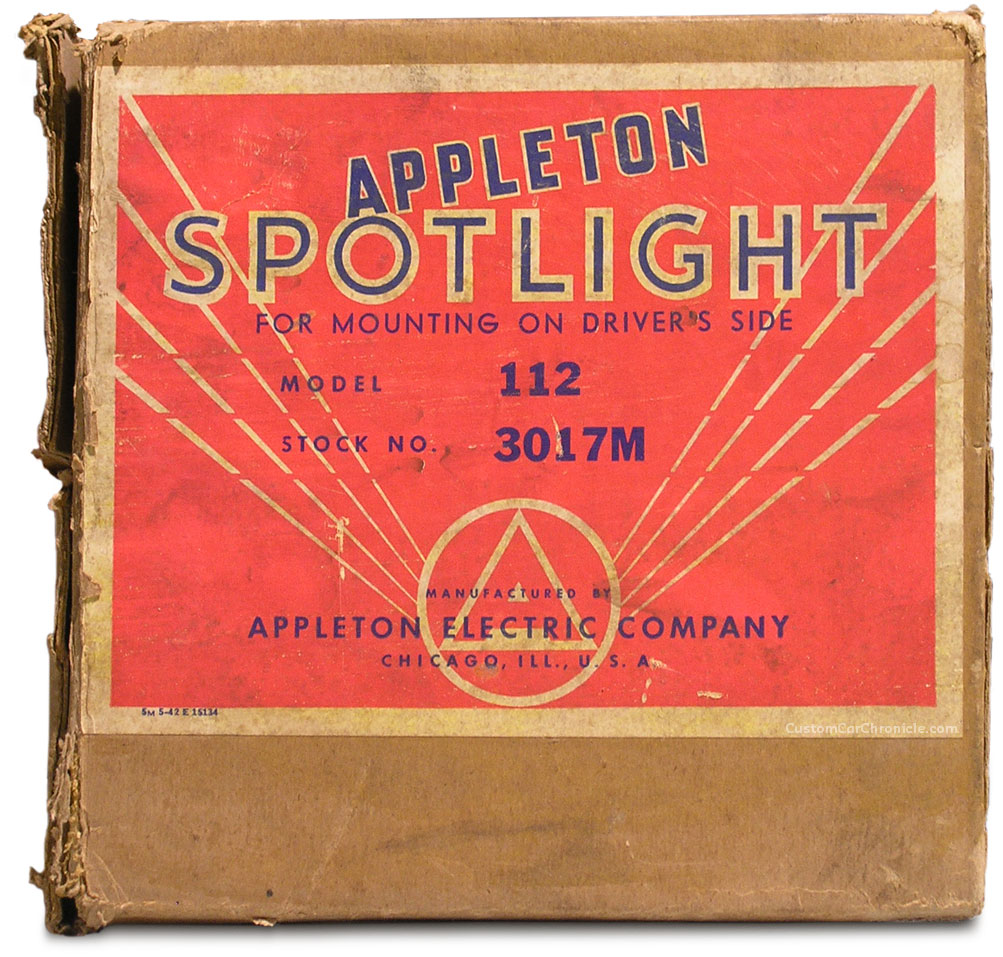
The spotlights used on the customs from the 1940’s and 1950’s were produced by several manufactories. The Appleton and Lorainne spotlights were the brands used on most customs. And the Appleton S-112 and S-522 were the most popular models to use. The Spotlights could be bought at your local speed shop or ordered from any of the early mail order companies. They came in left and right hand version. Each box came with full instructions and templates for the use of most of the then current automobiles. However it still took some skills to mount them properly and at the right angle to have the best result. The article published in the October/November issue of Speed Mechanics is an excellent article, and must have helped many custom car enthusiast all over the US in installing their favorite set of spotlights.
Special thanks to Ulf “Wolf” Christiansson and Stefan Elbrink.
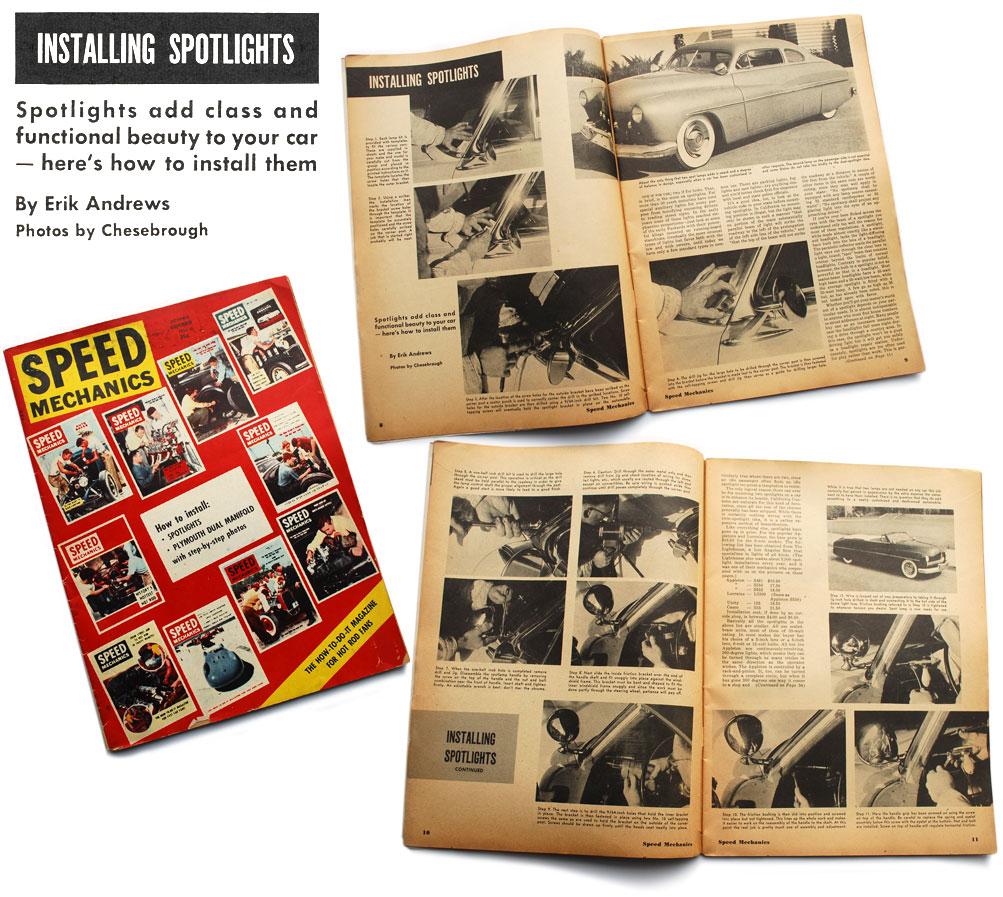 The magazine spend four and a quarter page on how to install the spotlights.
[divider]


[divider]
Below are some photos that give you an impression what you received back in the day when you bought a set of Spotlights for your Custom Car. The box and content shown here are from Wolf’s collection. He was very lucky to find some NOS Appleton spotlights on one of his many searches. Some of the instruction sheets come from Stefan’s collection.
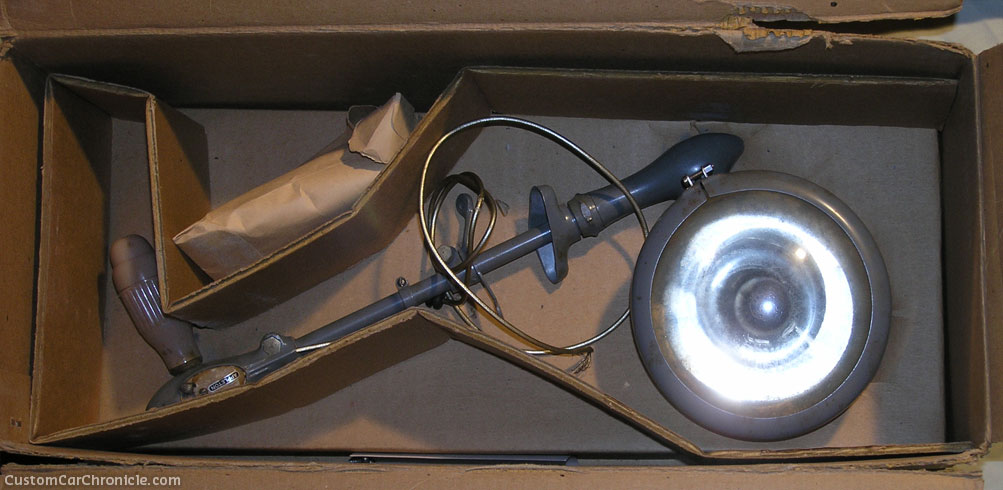 If you opened the box the spotlight was sitting between bended cardboard. On top of this was another piece of cardboard and the instruction sheets.
[divider]
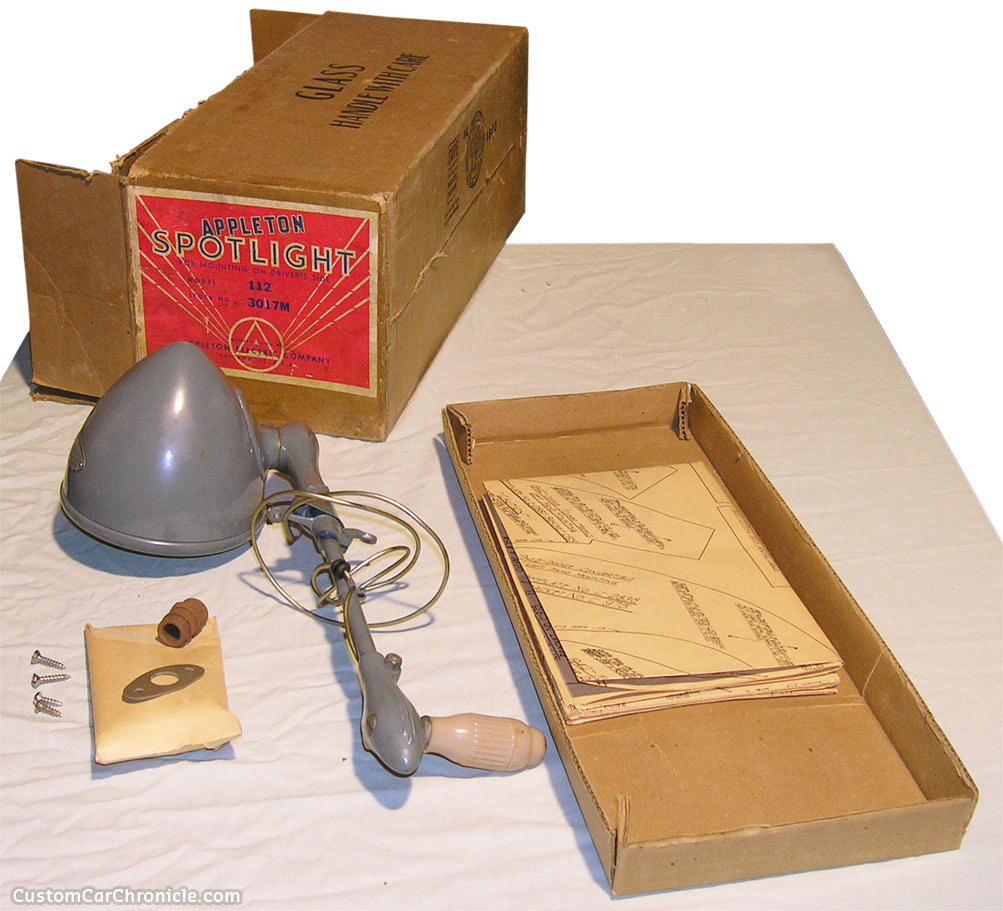 The complete content of the box.
[divider]
 This is the sheet with templates for the most common cars available back then. When you ordered the spotlight you have to specify which brand and year car you wanted to use the lights for.
[divider]
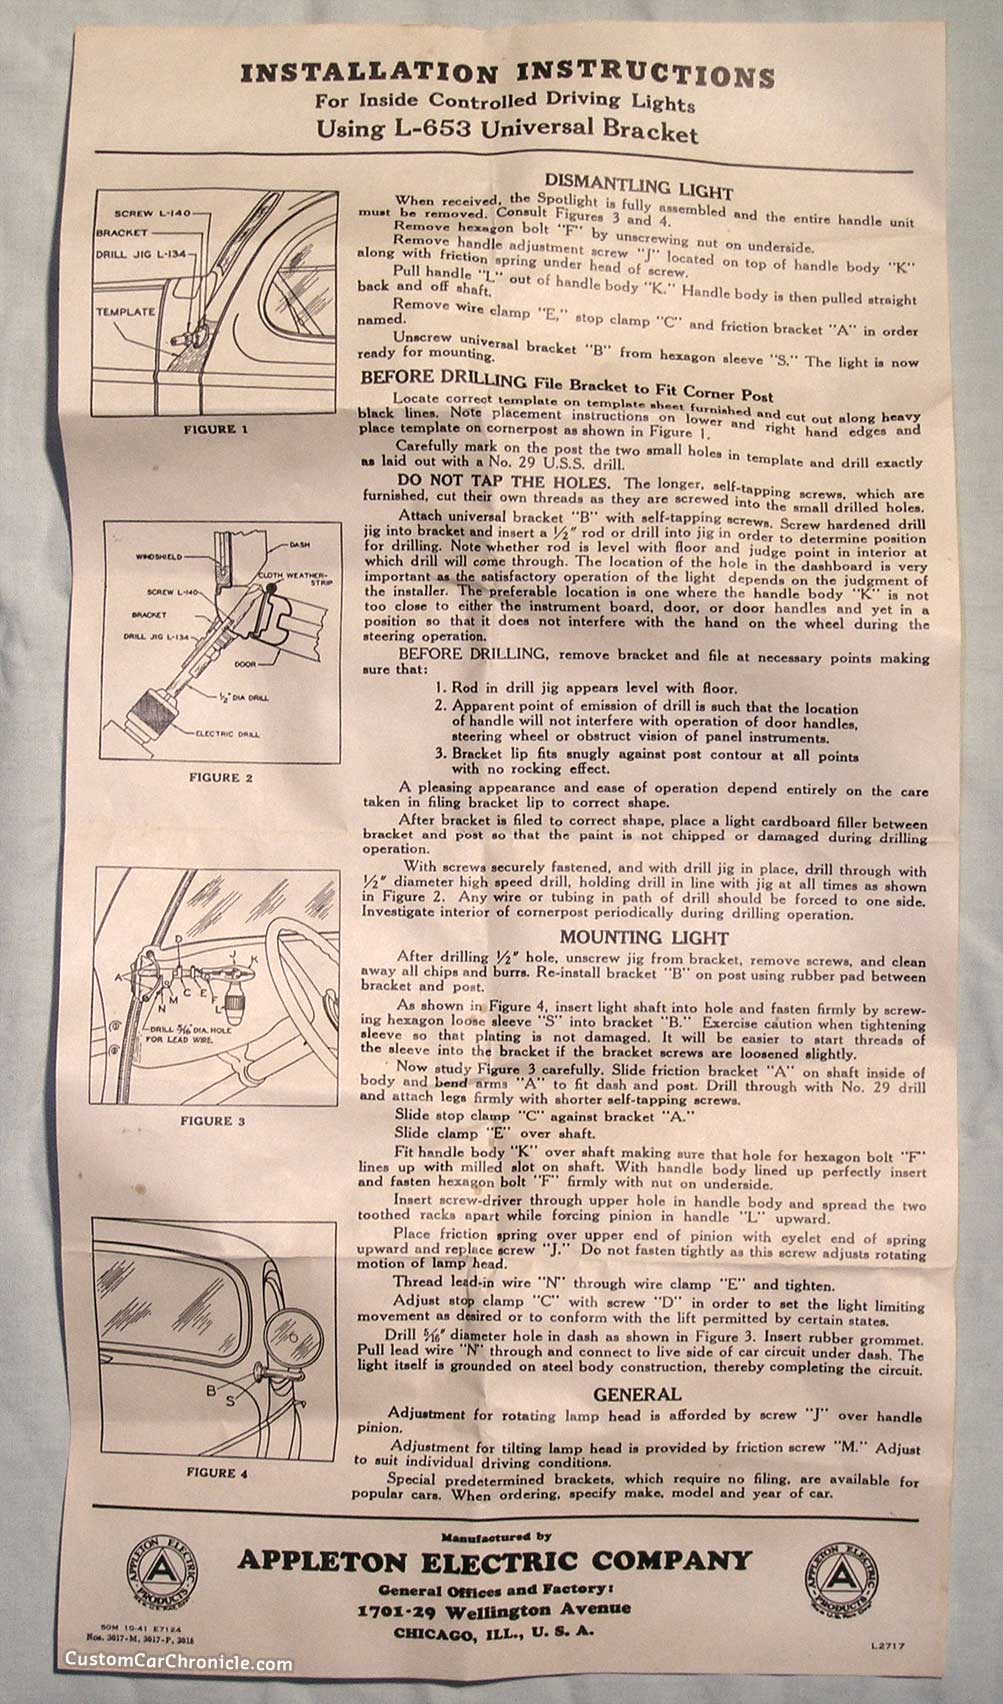 Clear instructions were included.
[divider]
 With well detailed instruction diagrams.
[divider]
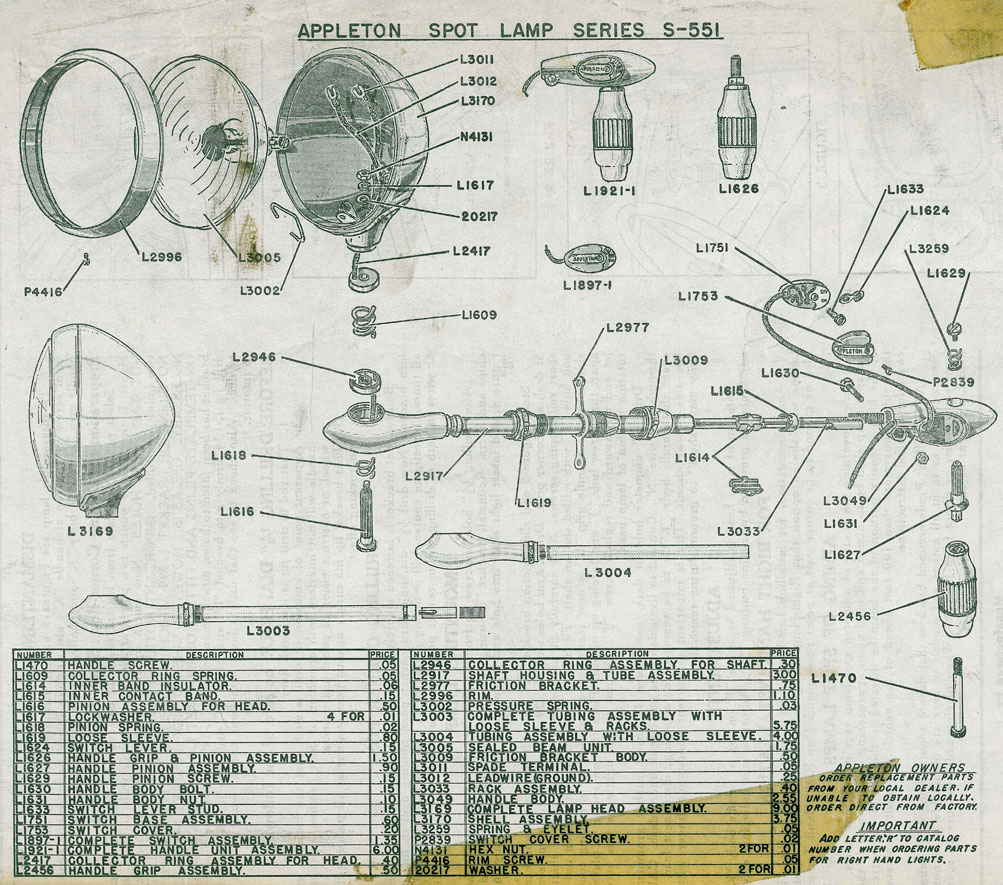 The backside of the instruction sheet included an diagram showing each part used in the spotlight assambly. This in case you needed to replace a broken part or had to repair something.
[divider]
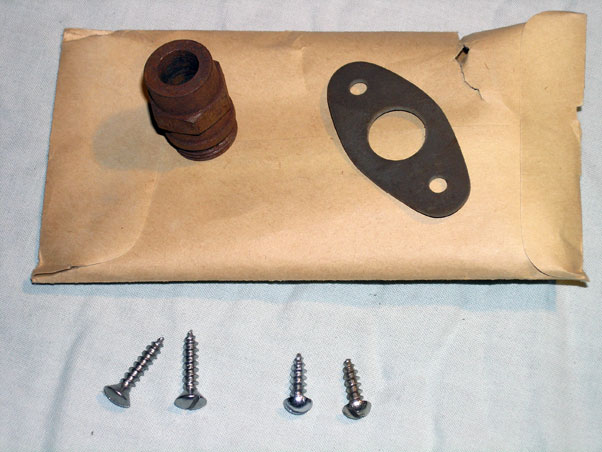
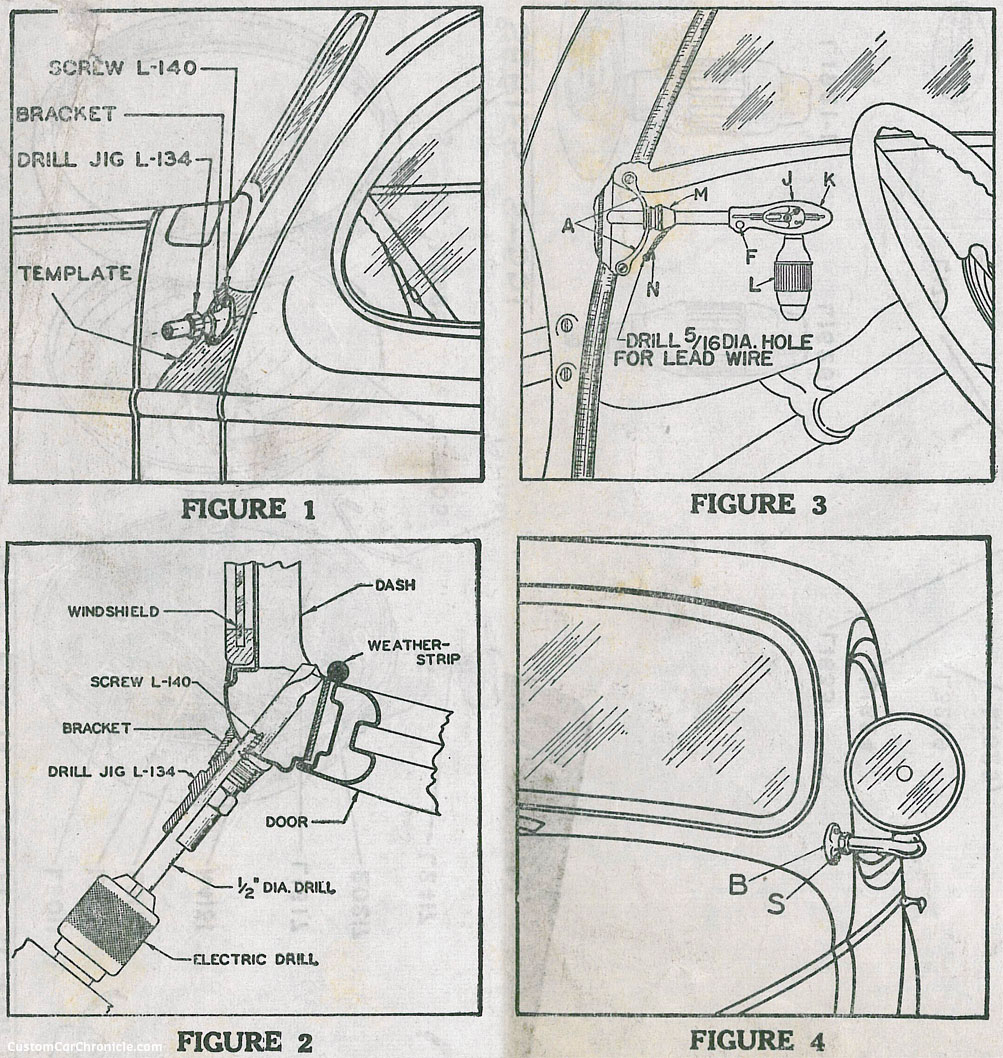
 Not included in the box, but needed for installation are these two brackets that go onto the A-Pillar. These had to be bought separate since a few different types/angles were needed to make sure the lights fitted your car model.
[divider]
[box_light]
Check out the CCC-Article on how to take apart the Appleton Spotlights for more information.
We have also created a CCC-Forum post about how to install the Appleton Spotlight.
This is THE PLACE to find more information, or ask any question about the installation, restoration or any other questions about the Spotlights.
[/box_light]
[divider]

[divider]
(This article is made possible by)

.
![]()

This is a great write up / feature. So detailed and valuable, I wish I could of seen this before I installed mine. It was a little nerve racking to put it gently. Once again…. great article and thanks to all who shared info. I love Appletons on sleds….always have and always will.
ONLY on the Chronicle will you find such a in depth article about an accessory part of a custom. Most other so called custom mags or sites really dont give a shit about this kind of stuff.
Guide was GMs own brand. Unity was another multimake aftermarket brand.
My 53 Eldo has dual Guide S18 spotlights fitted through the doors as a factory “dealer option”. These are a combined spotlight and mirror. Similar in shape to Appleton S-551s. I am missing the RH bracket that attaches to the outer door. I have searched for 10 years on ebay for a replacement Guide RH bracket. They are next to impossible to find and I’ve only seen a couple and then they sold for Stupid ebay money ($500 for a bracket). 99.999% were LH fitted. My 46 Conv has a factory “dealer fitted” Guide S16 LH windshield post only.
May be to late? But I do have a bracket for the RH site. I’am installing a Guide light now and there are brackets for both sites…
Sorry, already gone
Excellent! Great information just in time to swap out my dummy spots for the real deal. Thanks Rik, et al!
Great article Rik. Oh to be able to buy a S552 for $18.50 🙂
Not only did we use spots for looks, it made for great fun playing screen tag at the local drive-in movie theater. The biggest problem, I had was on a ’41 For convertible the inter pillar was angled, have ever try to drill a hole that’s not flat. It took a while to drill the hole then onto a rat tail file, I finely cleared the angle area. I welded a tube into the drilled hole which make for a very smooth on and off removal. I’ve had both real Appleton’s and cut off Appleton’s, some cars just don’t have the right design for the real ones. So, if you used real of dummy Appleton’s they look cool no matter which one’s you use..
Very useful stuff here – thanks! First time I’d seen reference to keeping the “shank parallel to the roadway”. That is the sort of info. you don’t get elsewhere.
Dave
Very useful stuff here – thanks! First time I’d seen reference to keeping the “shank parallel to the roadway”. That is the sort of info. you don’t get elsewhere.
Dave
It’s a lot harder to install Appletons than it appears, especially if you want the right look with the handle stems parallel to the beltline of the car. Having the correct templates is the first step, but I’ve used those only as a starting point sometimes…eventually moving the mounting bracket location down closer to the beltline. If you look at all of the Barris cars in the early days, their Appleton locations were near- perfect…not an easy thing to do! Dick Jackson was the main guy installing them at Barris Kustoms, but I’m sure many other employees did them too. I can tell you that some of the correct, original Appleton brackets can fetch at least $75-$80 for a ’49-’51 Merc, which is L999 or L997 depending on passenger or driver side. The passenger side brackets are very hard to find because there was more of a market for installing just one spotlight on the driver side. One option nowadays is using a pair of dummy spotlight outside brackets since the thread is the same as an original Appleton…there is a lot of meat on them to shave down for the right angle, but you still have to know the right angle/pitch of the bracket you are trying to replicate. Rik, are you going to do a forum post about this? 🙂
great article rik, appletons a must for kustom cars , like i allways say no spotlites not a kustom on my book, without them cars looks to plain just like any car on the road, lot of people just dont get it, installing them lots of times they were a hasile what i would do back in the 50,s first i would disconect the battery some cars the wires would run throught the post where u had to drill an if u started drilling some times it would short out an burn those wires running throught there if u did not disconect the battery, this is such a great article explains evreything perfect, an other good one rik,