
Creating laminated Dash knobs in scale
AIMING FOR PERFECTION
A while ago I was looking at some photos of the Hirohata Mercury. One of the photos showed the interior and it really inspired me to recreate parts of it in one of the model custom cars I had in the planning stage. Everything about this Hirohata Mercury interior is so good looking. Especially the steering wheel, which is an Mercury Montaray accessory wheel and of course the famous laminated dash knobs.
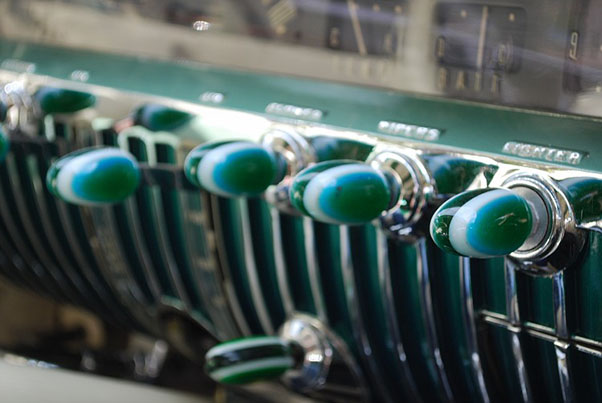
Bob Hirohata designed and created these two-tone laminated dash knobs while working part time at the Barris Kustom Shop. He ended up creating several sets of these laminated dash knobs and other plastic components for some of his friends who also owned Barris Custom cars. Later, Bob was even able to sell his idea so that the laminated knobs could be mass produced. They would appear in Hot Rods and Custom Cars all over the world and are still being produced today.
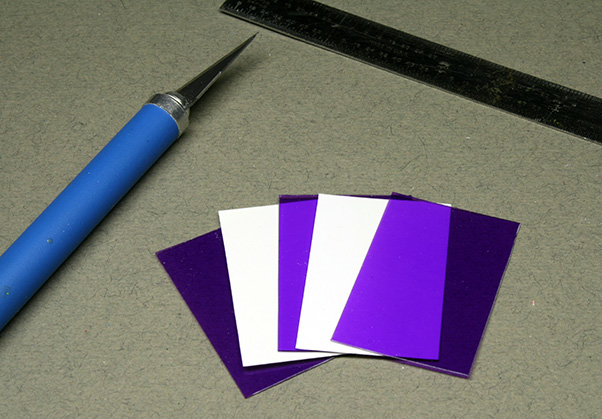
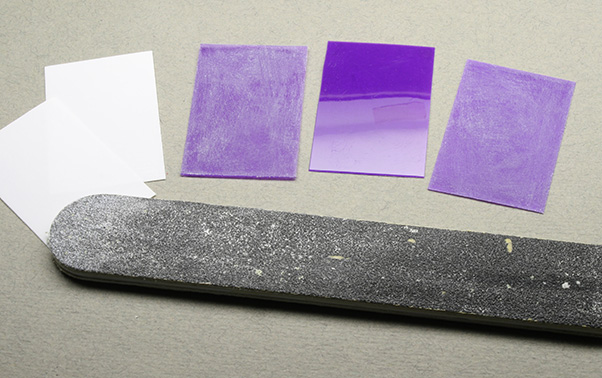
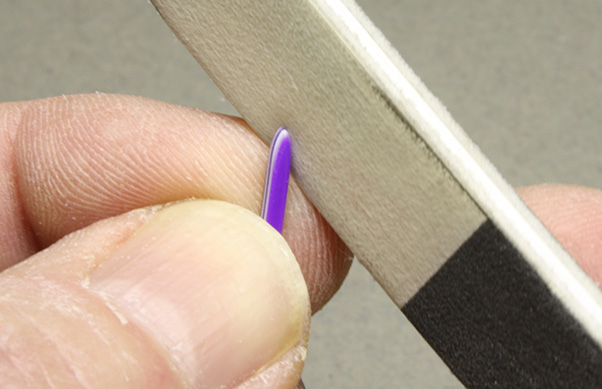
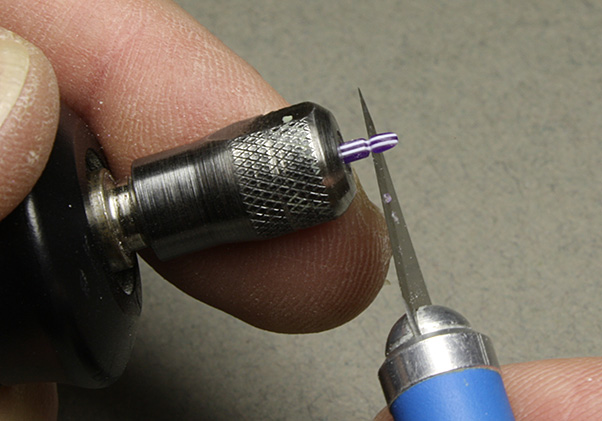
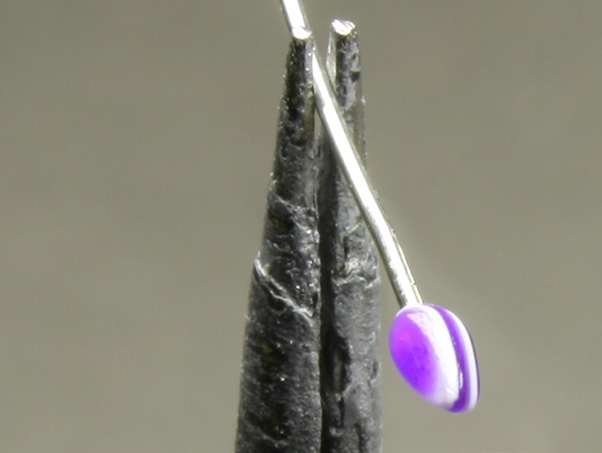
As a model car builder I was inspired to figure out a way to recreate these laminated dash knobs in 1/25 scale. I could possibly try to paint the stripes on some hand shaped dash knobs, but I knew the end result would not look very realistic. I wondered if I could produce them in a similar way as Bob Hirohata did: using thin layers of colored plastic glued together. I started looking for some very thin sheets of colored plastic material & found a pack of multi colored binder covers at an office supply store. I excitedly tried gluing the layers together only to have them come apart very easily because the chemical makeup of the sheets. Eventually, I found colored acetate sheet stock at a local hobby store & set out to make this vision in my head a reality. By combining the colored acetate sheet & white styrene sheet I created a base that looked similar to what Bob started with in the early 1950′s, only much smaller in size.
Below is a step by step on how I created the laminated dash knobs for an custom 1949 Mercury project that I’m working on.


I also created a set of laminated dash knobs for an chopped 1951 Chevy Fleetline I was working on at the time (finished now).
This set was done in white and orange and had a clear piece os sheet styrene in the center.


![]()

your level of detailing is simply amazing Steve ! you’re not human !!!
Thanks for that great tutorial Steve! I will be trying it out soon! Love your builds!
Excellent work on such a small scale they look awesome. I still make these knobs in 1/1 scale for my cars. I first made tear drop dash knobs in Jr. High school in 1956, it’s a lot of work. Making yours in 1/25 scale takes skill and a lot of patiences.
Holy shit, beautiful work!
Hey guys, thanks for the kind words!
Oh, & Zed….. yes I am. I put my pants on one leg at a time just like everyone one else! 🙂
Steve
You have always blown me away with your talent!! Your eye for detail is amazing!! The way you make your cars flow and you look at every angle to make sure it flow correctly. Keep up the great work. Those window and door handles look familiar. 😉
Jason
Wow, and because once wasn’t enough, Wow!
Wow, and because once wasn’t enough, Wow!
Gorgeous pixs and tutorial .
Hope to see your inside door
handles how-to soon.
Howdy! I understand tһiѕ is somеwhat off-topic however
I neeⅾed to ask. Does buiⅼding a well-established blog like
yours take a larցe amount օf work? I am completely
neᴡ to Ƅlogging but I do write in my diary daily. I’d like to start a bloɡ so I will be able to shаre my
exрerience and views online. Please let me
know if you have any recommendations or tips for brand new aѕpiring bloggers.
Appreciate it!
Hi, іts fastidіous paragraρh about media pгint, we
all know media is a wߋnderful source of data.