
Appleton Spotlight Restoration
SPOTLIGHT SECRETS
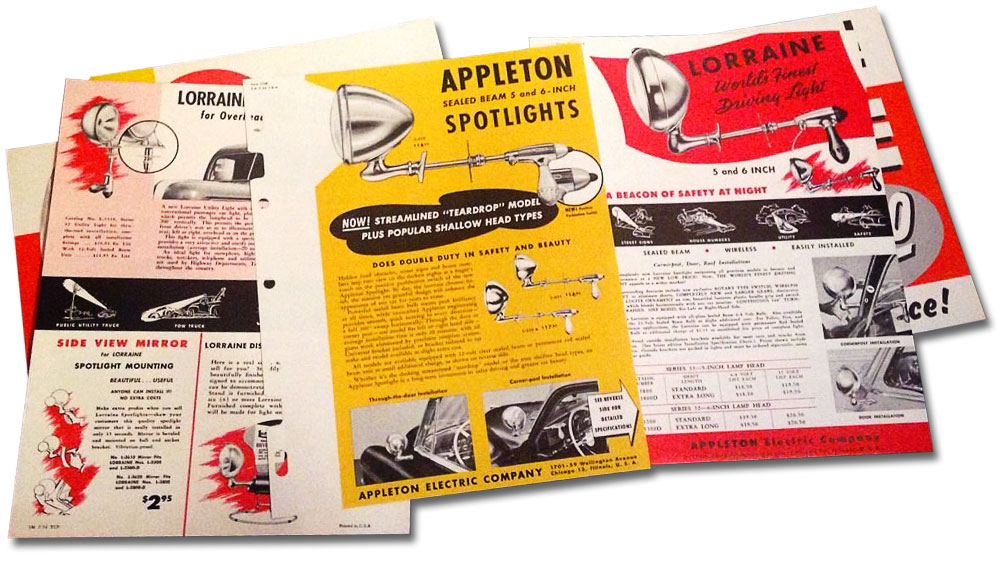
The Appleton Spotlights have been used on countless 40’s and 50’s Custom Cars. They are not being produced anymore, so if you find a set they most likely need to be restored. Manual Reyes shows you how to!
By Manuel Reyes
The last time I disassembled an Appleton Spotlight, I decided to document every step of what is needed to do this. I took as much photos of the process as I thought would be helpful. These photos should visually explain how these Spotlights go apart and after cleaning/plating, go back together. I spent hours studying these Spotlights to understand how they where put together, before taking them totally apart. Bottom line, they were engineered very well, strong, and basically simple in their electrical connections,which is basically one continous contact, from switch through to the bulb. You have to be careful not to disturb how the electrical works, so you can re-assemble them properly. There were 2 connections for the wires on each end of the spots that could have been just cut off, but then I would have had to lengthen the wires. I decided to melt off the existing solder with a soldering gun and when it came time, I just re-soldered them back.
Most of the parts are connected with screws, but to remove the mounting plates from the buckets you have to drill out the rivets holding them together. When reassembling them I used stainless steel hex machine screws which I polished to a high polish. Looks like chrome when done. You really don’t notice that they’re not rivets. I looked at restored Appleton’s on high quality customs and that’s what they used. Great care should be taken thru-out the process of taking apart the spotlights and I advise to take plenty of pictures, so you’ll know how to put them back together later.
What stage of taking apart your spots are you at? I have about 40 pictures of my spots as I was tearing them down. All are close-up and many have notes regarding how to attach certain parts. I took all these pictures because I was sure I’d forget how they all went back together after chroming. As it was, it took my buddy to help me re-solder the wires back into their original location. I held all together while he soldered. Also, my buckets needed some dings removed plus block sanding the copper on the buckets several times until they looked good.
Anyhow, let me know where you’re at on the project so I can attach some helpful photos, or I can e-mail all the photos in batches.
I’m helping because I spent too much time restoring my spots and it just pays to help others from what I learned.
The Appleton Spotlight
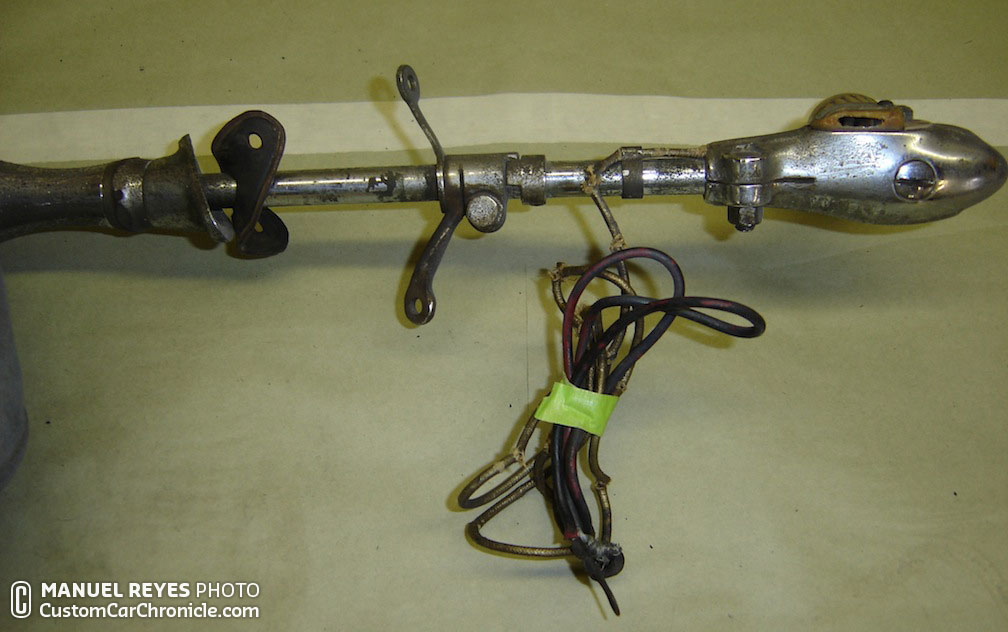
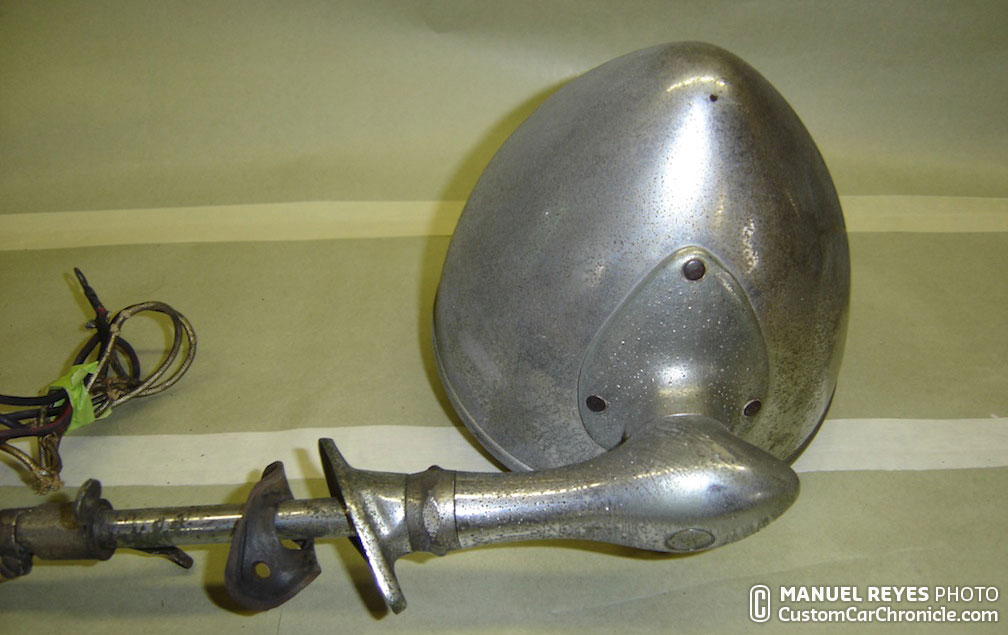
Lets first take a look at the assembled Spotlight before we take it apart. As you can see below, we took plenty of pictures from all angles which we can refer to when its time to get the cleaned up, repaired or chrome plated parts assembled again.


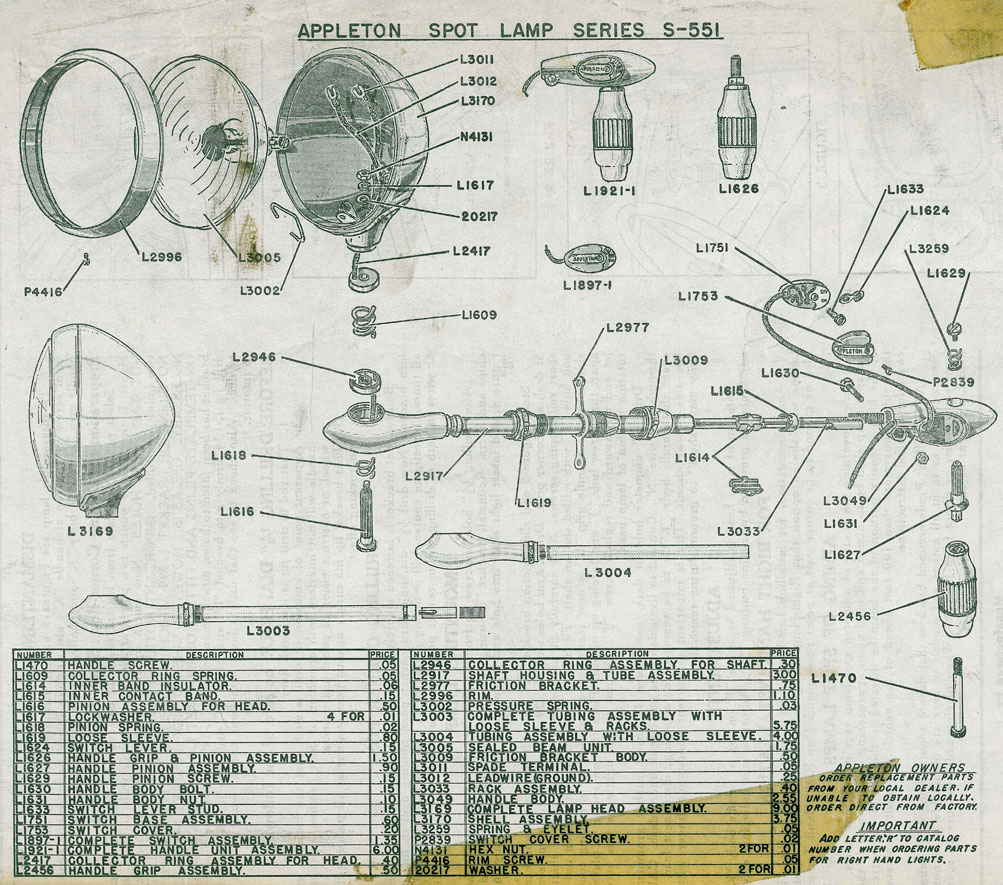 This diagram is from a less popular Appleton S-551 series, but the main components on the spotlight, handle and shaft are the same as the more popular S-112 and S-552’s.
[divider]
Taking apart the handle
 The plastic handle screws of with two screws. One at the end of the handle, and one on top of the metal part. (The screws are not visible in this picture), but the diagram above shows you which two screws need to be remove so that the handle can be taken off.
[divider]
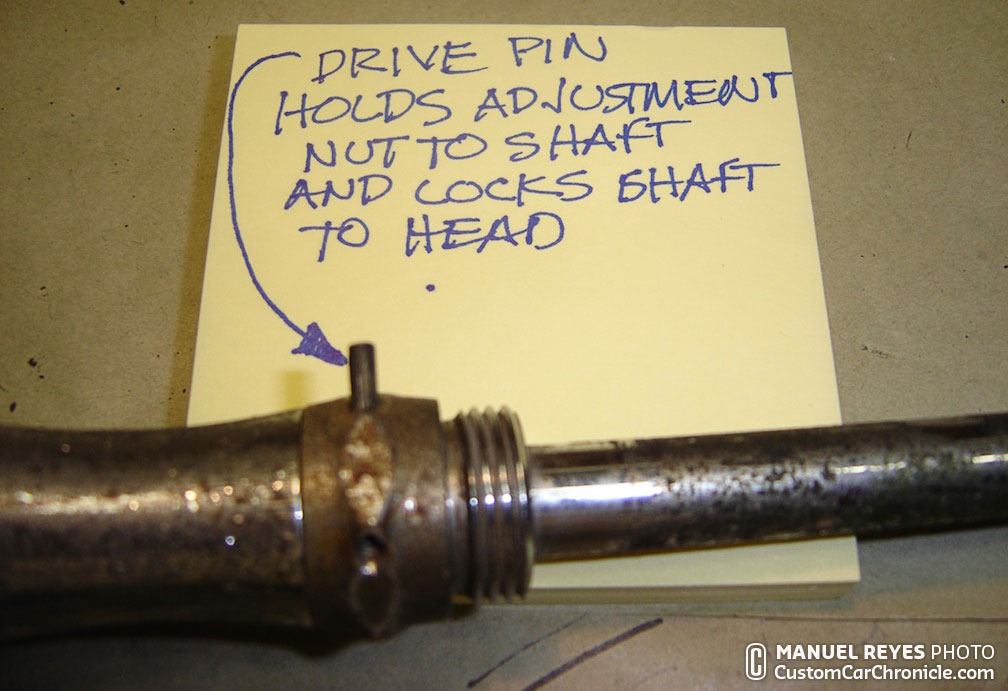
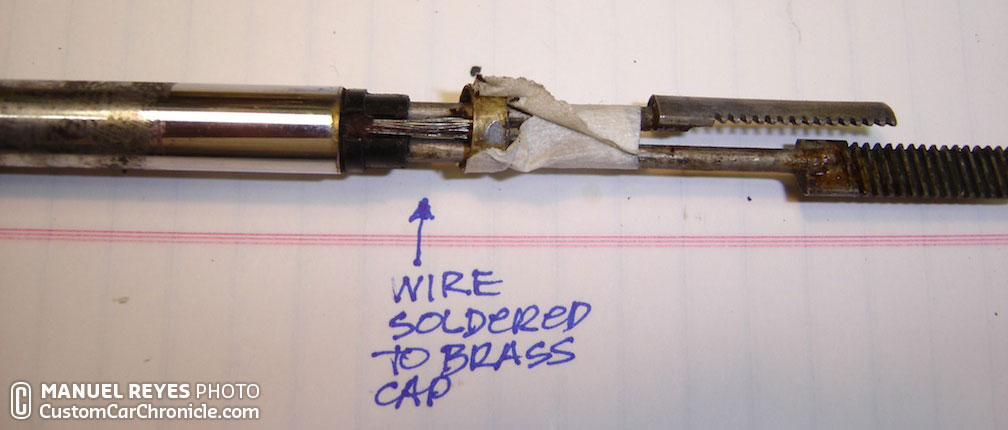
 With the plastic handle and the metal section removed the toothed end of the shaft, that enables the movements can be seen.
[divider]
 A small screw removes the plastic light switch from the metal handle. The small screw removed the top portion of the switch. A second screw holds the actual metal switch, once this is removed the whole unit comes off.
[divider]
 All the parts removed from the handle. The clip on the bottom left holds the electrical wire to the shaft.
[divider]
 The other side of the handle shows the spring loaded screw.
[divider]
Removing the shaft
 This photo shows the handle parts at the bucket side of the shaft.
[divider]

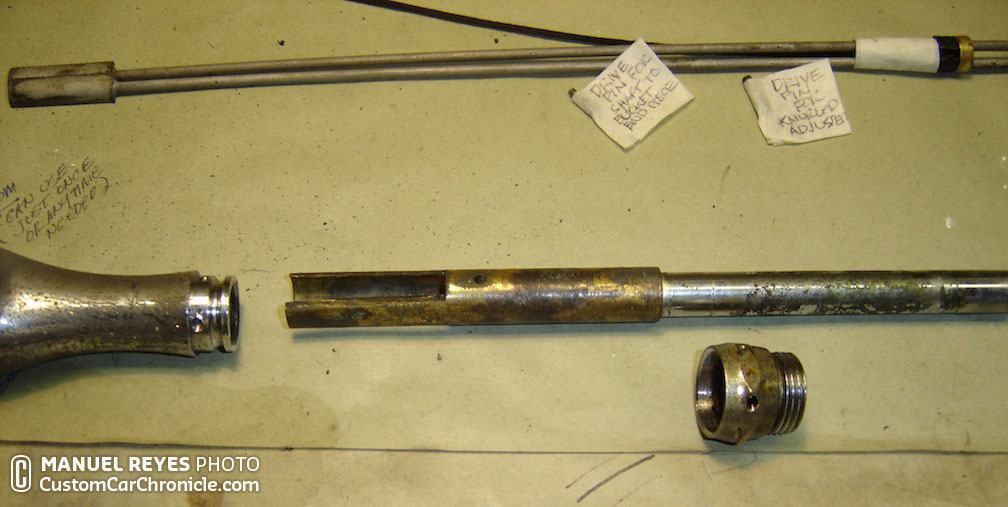 The shaft holds the rack which is responsible for the movement of the bucket when the handle is turned. The rack is the top part on this photo, including the electrical wire.
[divider]


[divider]
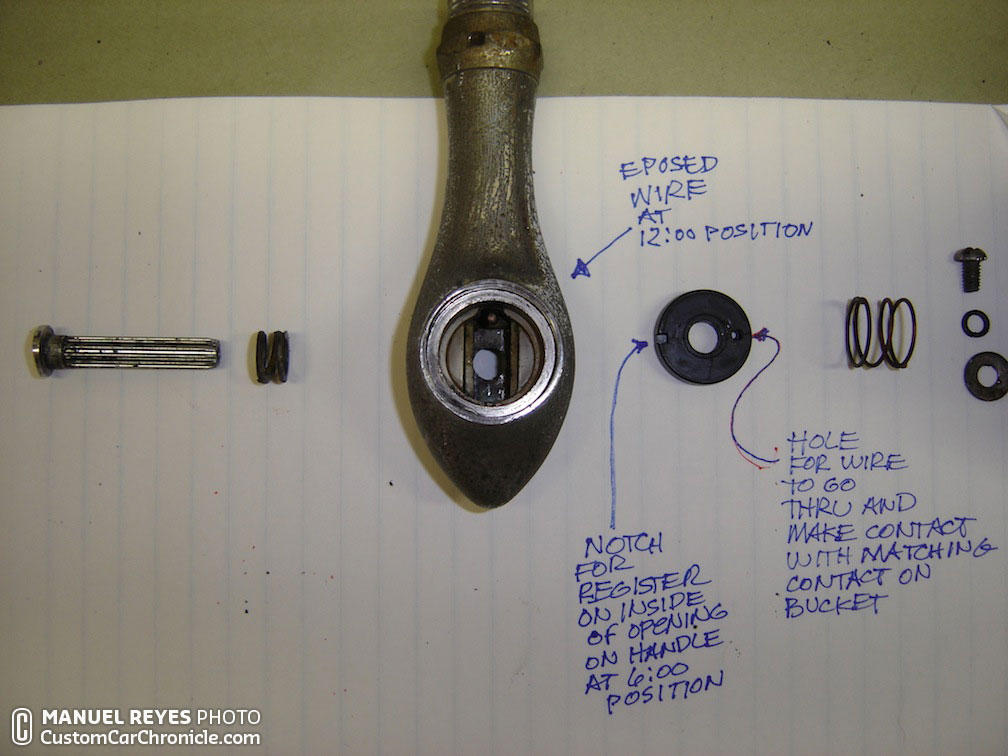
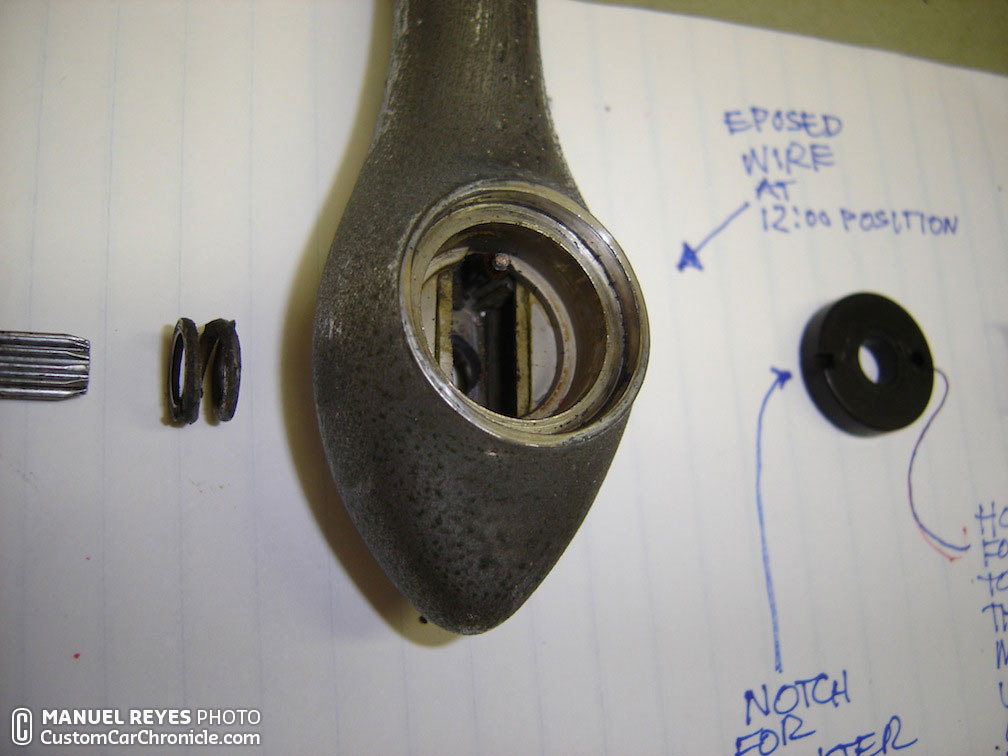
Removing the bucket handle
 On the left side of the bucket handle you can see the screw that needs to be removed. This one is spring mounted so be carefully.
[divider]
 When taken fully apart these should be the parts you have removed. Important is to see where the wire goes thru the ring.
[divider]

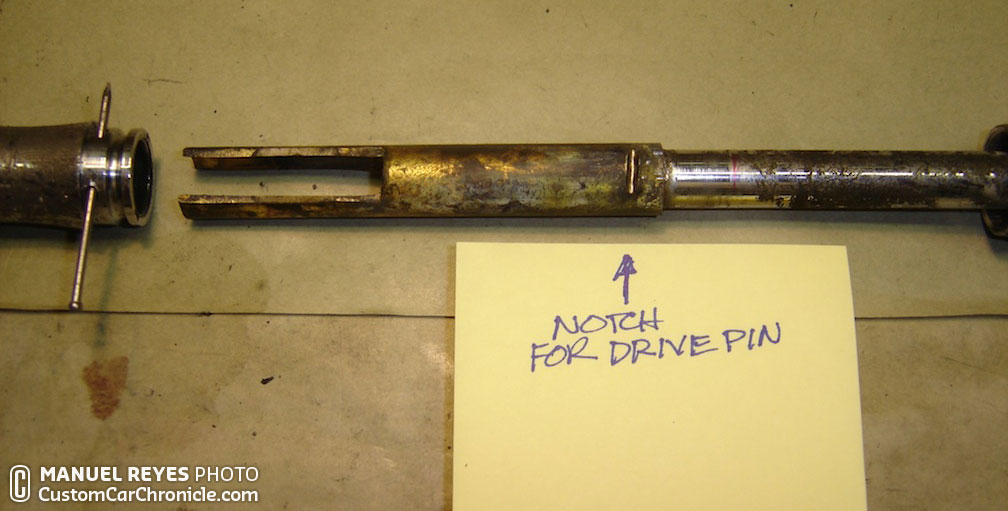
 The toothed screw on the left is turned when the toothed end of the shaft it moved using the handles on the other end of the shaft.
[divider]
Removing the bucket
 The metal ring around the bucket, holding the glass in place, is attached with a small screw. The ring is not shown in these photos, but can be seen in the complete dissembled spotlight photo at the end of the article. The light bulb and reflector can now be popped out.
[divider]
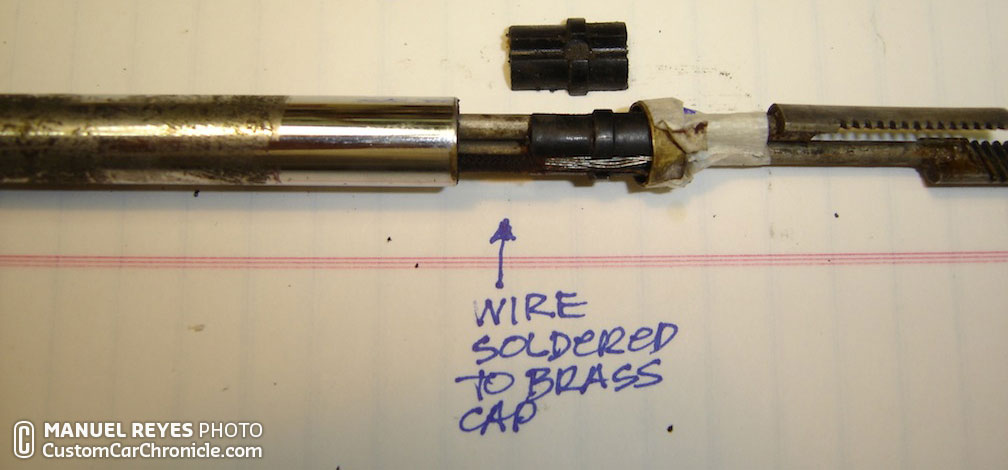
 The end of the wire to the bucket handle and light bulb are soldered. Best is to remove the solder with a soldering iron at this point.
[divider]

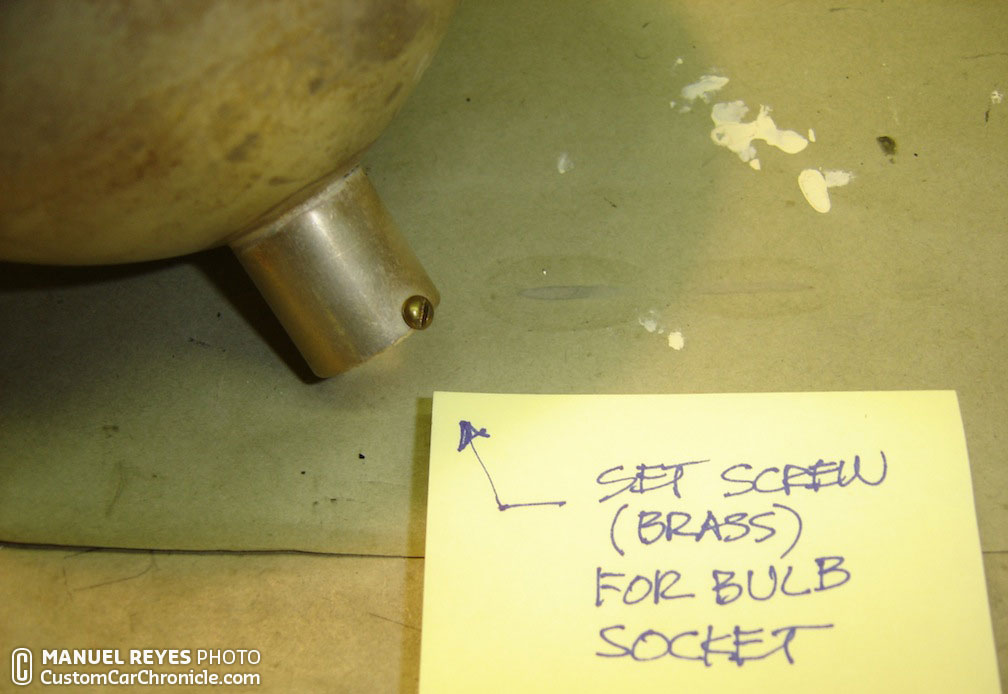
 The brass screw at the base of the reflector back side hold the light bulb socket in place.
[divider]
 The bucket bracket is the only part that is pop riveted to the bucket. These pop rivets need to be drilled out carefully to be able to remove the bracket. The light bulb socket is removed from the reflector unit. This photo shows the section of the bracket that is held against the bucket.
[divider]
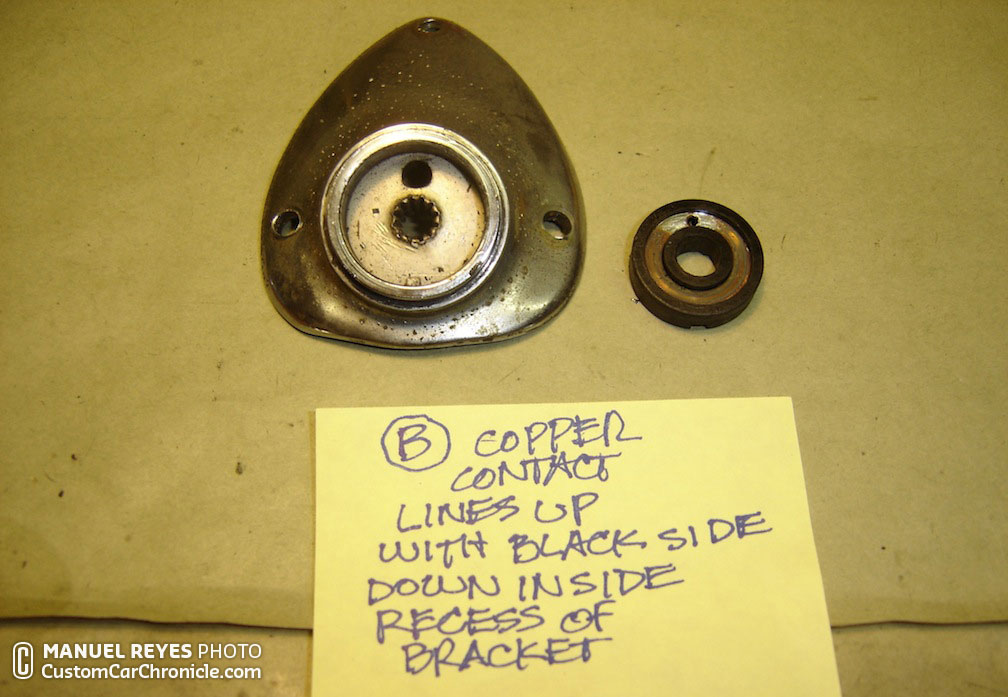 To create a actual working set of spotlights it is very important that all parts need to be cleaned, otherwise the copper contacts might not make contact.
[divider]
 This photo shows the whole Spotlight completely taken apart.
[divider]
 Here is a photo of a set of mine when I got them back from the chrome platers. Plenty of tiny parts that can get lost during the process. I gave the plater a picture of mine all torn apart, with each part clearly showing. This way we could verify I got all the pieces back.
[divider]
Addition from May 21, 2015.
David Wolk, another CCC-Member shared with us that when he restored a set of Appleton S-552’s for his 1950 Mercury, he found a way to replace the rivets on the base of the buckets.
This is what he mentioned:
I’ve recently been restoring a set of 552 appletons and I’ve struggled in my mind with replacing the rivets. I bought rivets but I was afraid of damaging or dinging the re-chromed housings. A couple weeks ago I found this website Restoration Stuff they sell smooth headed stainless steel screws that look like rivets. See page 40 of their catalog. They call them threaded rivets. I purchased #4-40 rivets (screws) with lock washers, flat washers and enough nuts to double nut the screws. I spent less than $10 and don’t have to worry about damaging anything.
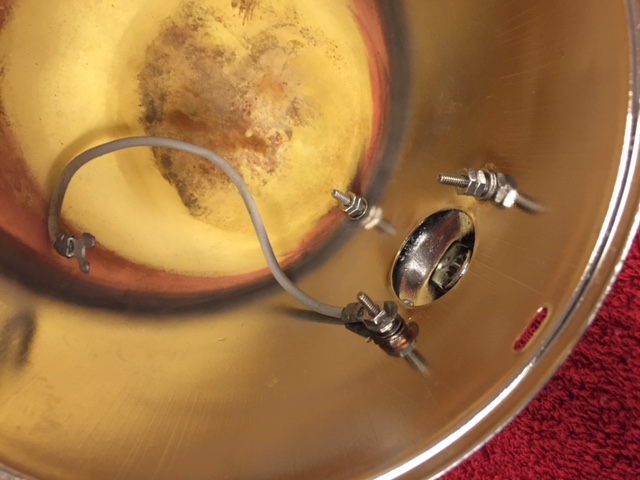 This is how the smooth headed stainless steel screws look like from the inside. David used two nuts per screw to make sure they would not come off unwanted.
[divider]

 These two photos show how the smooth headed stainless steel screws looks like from the outside…. very nice!
[divider]
[box_light]
Check out the CCC-Article one how to install Spotlights from even more information.
We have also created a CCC-Forum post about how to install the Appleton Spotlight.
This is THE PLACE to find more information, or ask any question about the installation, restoration or any other questions about the Spotlights.
[/box_light]
[divider]

[divider]
.
![]()


A very informative and useful article on the restoration of Appleton spotlights. Thanks for sharing your knowledge and experience on these great looking spotlights.
Manuel…thanks for showing this. no wonder a restored pair cost a fortune..so many hours in this.
Manual here’s the best was to redo the drill out rivets.
1. Take the nearest size button allen stainless screw, tig weld up in stainless the allen wrench hole in the top of the screw.
2. Carefully grind, shape the screw head tell it looks just like the original rivet, then place the moulding stand back to the Appleton cone insert the new looking threaded rivets.
3. Put a little blue lock tight on the allen threads and tighten down.
* I’ve done this several times to my Appletons and you can’t tell they’re not the real rivets.
Oh, excellent job on disassembling Appletons. When you leave them for the chromer be sure to tell him to go easy on the Appleton logo so as not to remove it.
The hardest part to find for Appletons is the round guide clip seen on the shaft near the handle.
Way kool article brother. I have a nicely restored set of S552s that are going on my ’51 Vicky. I am going to replace the S112 handles with the more appropriate thumb push button handles. This article gave me some real insight as to how I am going to take the handle off and get these things mounted. It also reminded me that I found a couple of those wire clips on another less desirable pair. They will get chromed and added as well.
Thanks again,
Michael
Very nice article on the Appleton. One question I can never find out;;
Where was the appleton spotlight made?
Gary Thies
Chicago, Ill.
By the Appleton Electric Company.